Getting Shocked
For this piece, the goal was to recreate a strong reaction to something, like say getting electrocuted by a strange device. I also had the intent to make it somewhat comedic like an old cartoon or slapstick skit. I focused on making the poses seem goofy but still well balanced. I created my own reference again and used Maya to animate the Silver Cyborg Maya Rig by Truong CG Artist.
Silver Cyborg Maya Rig by Truong CG Artist found: https://truongcgartist.gumroad.com/l/cyborgrig
The Fun stuff
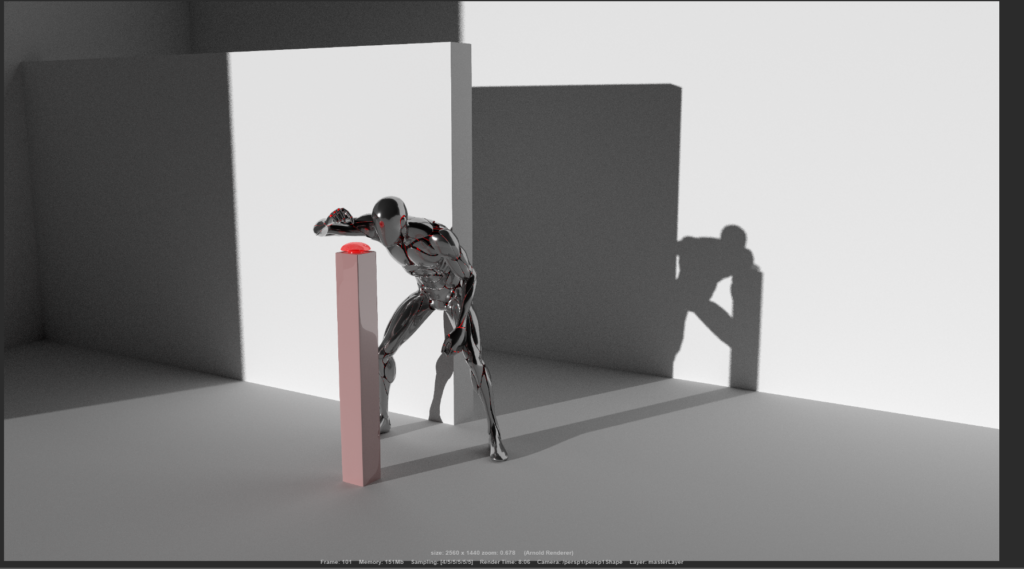
When I first “finished” this project I had to render it quickly and dirtily in Maya, and I really didn’t like it that much visually. Later I would make some small changes and render it again it would be less noisy but still basic and low quality. I had particular problems with the shadows the second time I got them to be less noisy at low quality, but they became stark black which really doesn’t look appealing. These first two Videos are the renders I am talking about:
The first video is much darker and has more noise in the image, especially the shadows. The second is brighter but has little to no ambient conclusion, depth, or fall-off. This is serviceable in a pinch but doesn’t look very good. This didn’t bother me at the time because I was more focused on recovering the grain from the few shadows that were left in the scene, now I realize that I just went to the opposite extreme.
I should mention I am not a render tech it’s not my forte and I never had a full class on it in uni. So it took me a while to research and figure out how to take out the noise in a low sample render, in Maya. After I finally got out of uni I had more free time and one of the things I wanted to do was start rerendering different projects in much higher quality. I was gonna shoot for 2k at least but I didn’t know how long it was going to take or how to make it look correct, after all both of my first attempts were in 1080p and took the better part of a day. So I started experimenting.
The Experiment
If I’m being honest I didn’t want to keep using Maya for a myriad of reasons, but I didn’t have hard evidence for things like render time. My problem mainly came from Maya’s stifling workflow, subpar features, and limited expandability. Plus it’s very unstable it can crash from being too large or too old and you don’t find out till you try and do something basic like use the move tool. Maya also creates this gross cluttered file mess that makes it annoying to keep up with and you have to reset file targets way too often. I could rant about the shortcomings of Autodesk for a while but it’s the industry standard so it has to be used because (idk they haven’t told me yet I think it’s money) In a more succinct way, Maya is cluttered and gross. This isn’t a new sentiment most of my early classes were how to deal with Maya being weird, we were even encouraged and shown how to render Maya files in other software like Unreal Engine or Houdini, though admittedly I forgot those bits.
So first I needed a claim how about:
“Blender can produce higher-quality renders faster than Maya”
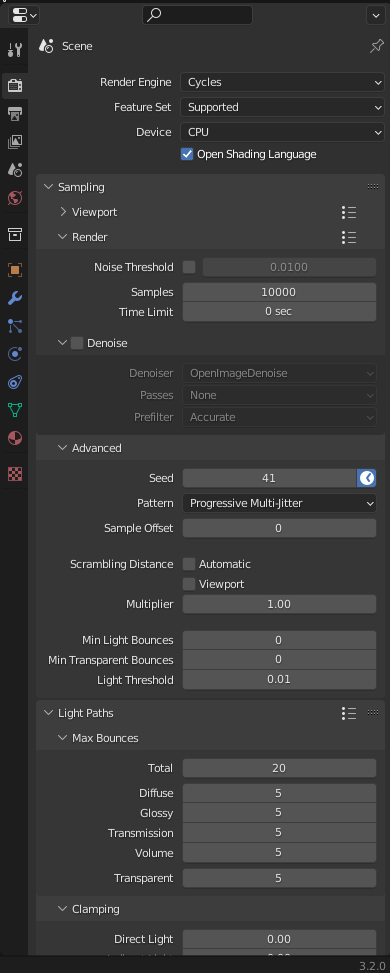
Why Blender? Because I like Blender the most out of all the alternatives. That said I now need test parameters I decided to use this project and frame 101, cause it looked cool. Then each test I would take a screenshot of the render settings and then a screenshot of the final render and its time.
Flaws
There are a few problems with the actual execution of this plan. For one the file was originally a Maya file that was exported to an fbx and then imported into Blender. This took some work getting Maya to export with the correct settings and Blender to import with the correct settings. The settings themselves aren’t that important as they can vary and didn’t end up being that different from the default what really made the conversion easiest was a Blender plugin called Better Fbx Importer & Exporter by Mesh Online.
Don’t worry there are yet more problems to be had. After I converted To Blender I changed shaders, lights and camera angles making it different from the Maya file, which met I had to replicate those changes back in Maya. This just means They aren’t exactly the same colour, or angle as the values aren’t one to one.
There is also a problem with the Operating systems. I run a Linux machine and I ran blender on that, however, while you can run Maya on Linux its annoying and difficult and Maya 2020 fell apart a few years ago. This Means I have to use my Windows 10 virtual machine(VM), It has full passthrough, for GPU and stuff, and uses 20 cores and 32 gbs of ram compared to My host which has 24 cores and 64 gbs of ram.(gpu doesn’t matter render engines still work best on CPU) I am using Maya 2020 because it is the last student version I got and I never felt a strong need to upgrade based off the dev logs.
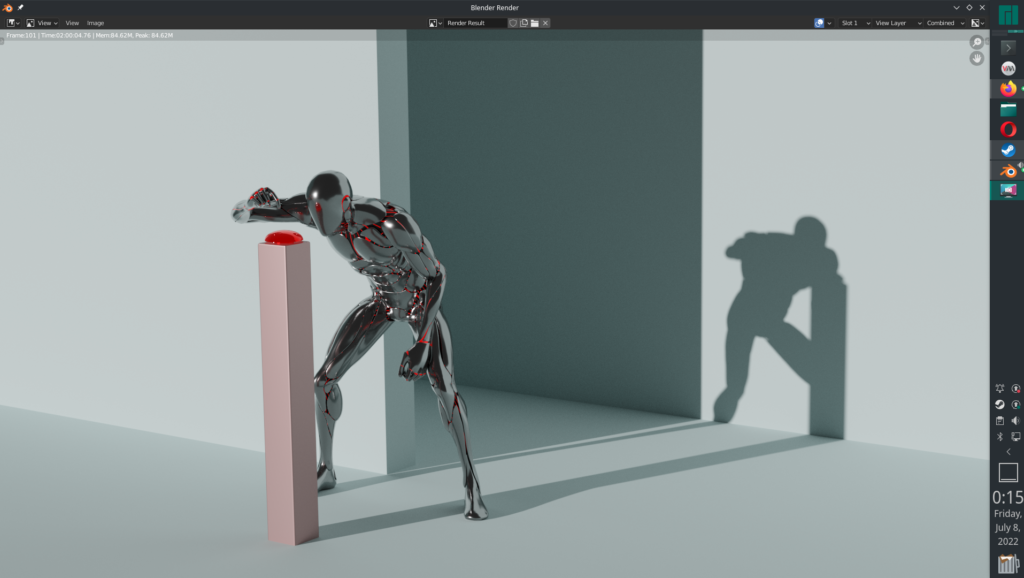
I also didn’t plan this out I just ended up doing this for a few hours and taking screenshots, so the Maya trails aren’t analogous to the Blender trials. For instance, in Blender I cranked the samples to 10,000 and it took 2 hours. With Maya I focused on short times with good quality.
Also, the render settings are just different and barely translated Maya has some sliders for sample rates of light bounces for different materials, blender had image sampling, light bounces, ai denoise, and a few other things to worry about. Maya probably has the settings too but I can’t find them.
So this is not a perfect comparison when it comes to Maya I don’t know enough to figure out the intricacies of the render settings, whereas with Blender it’s much more readable and has better documentation.
The Results
Starting with Maya because I ran way more renders with it trying to get it to just kinda look correct.
Maya [3/9/10/9/7/10] 9:23
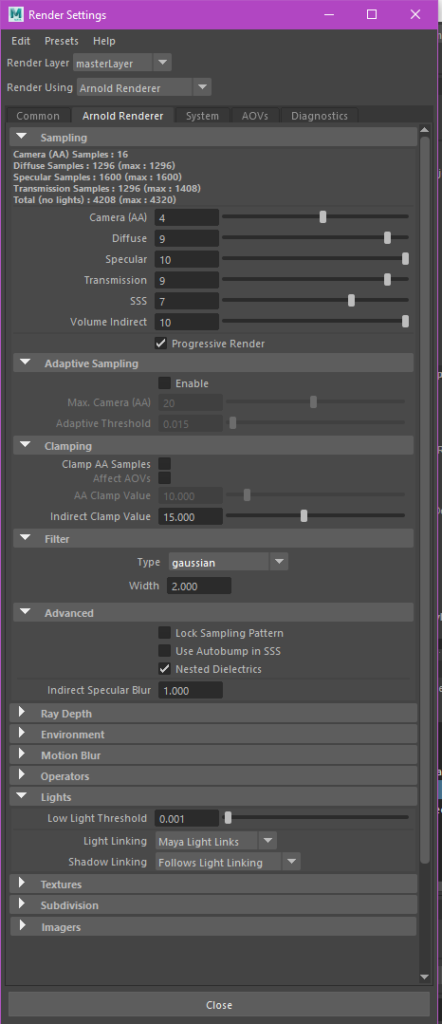
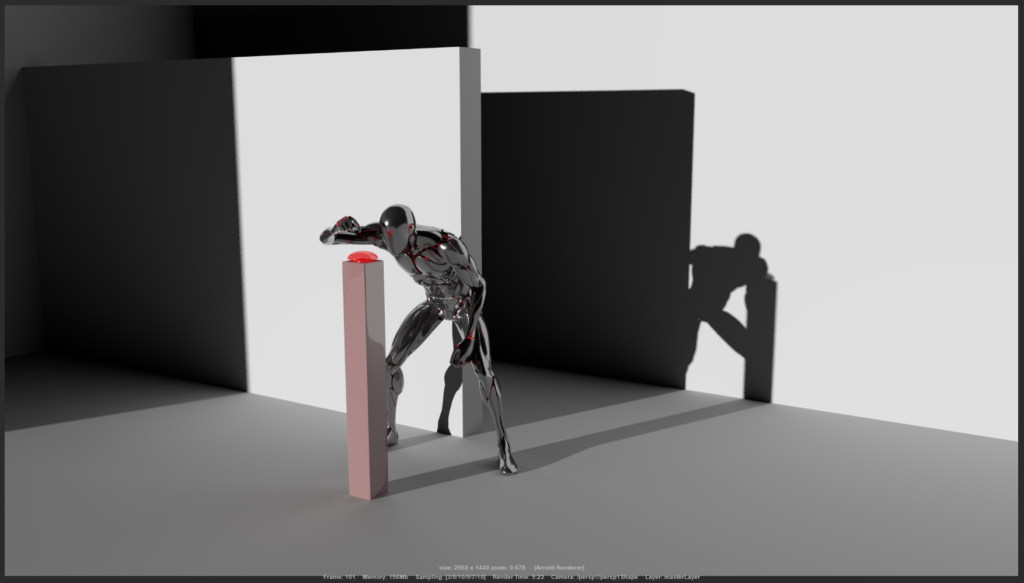
So the difference between these besides sample rates is ray depth and I didn’t screenshot the first ray depth settings I might be able to go back and find them and then update.
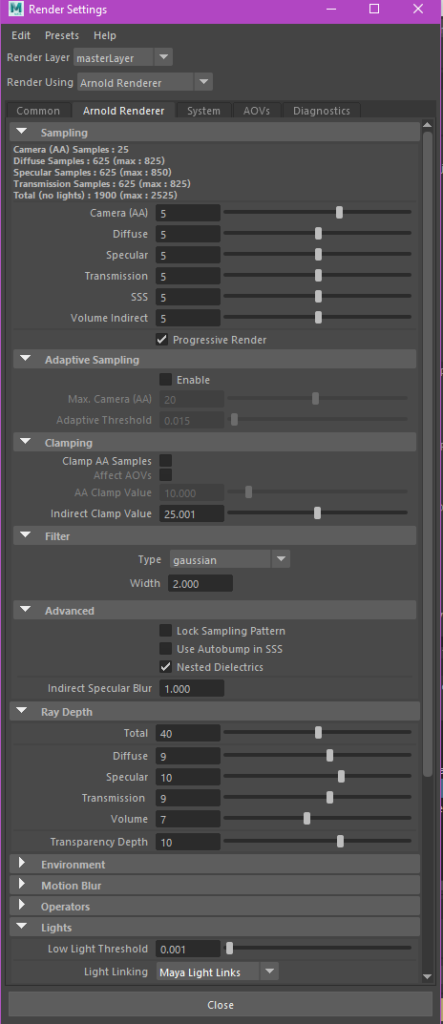
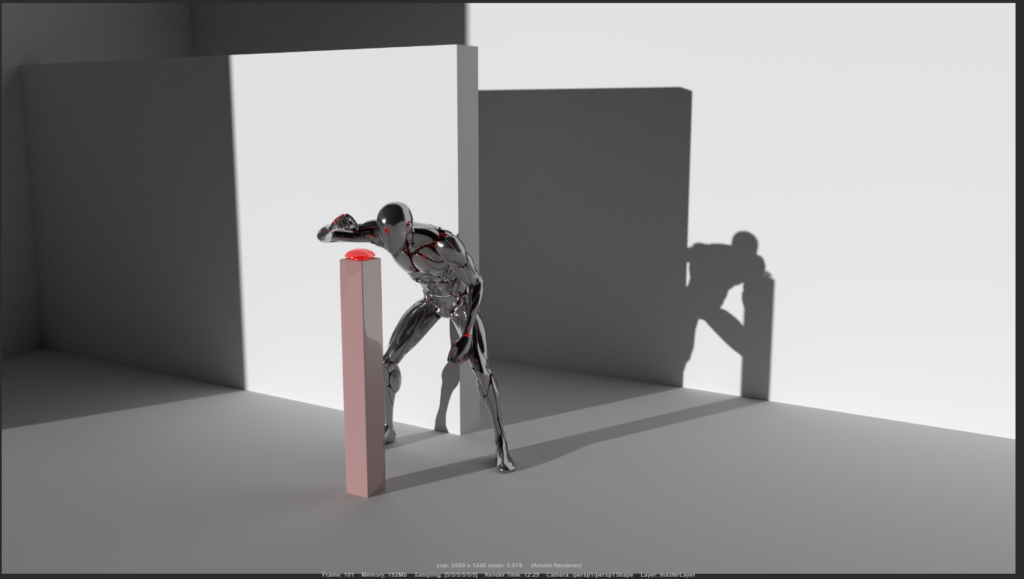
Maya [5/5/5/5/5/5] 12:29 Ray depth fix
Maya [4/5/5/5/5/5] 8:06 Average samples 500
What I mean by average is if you look at the (max:xxx) I tried to keep them in the 500 range
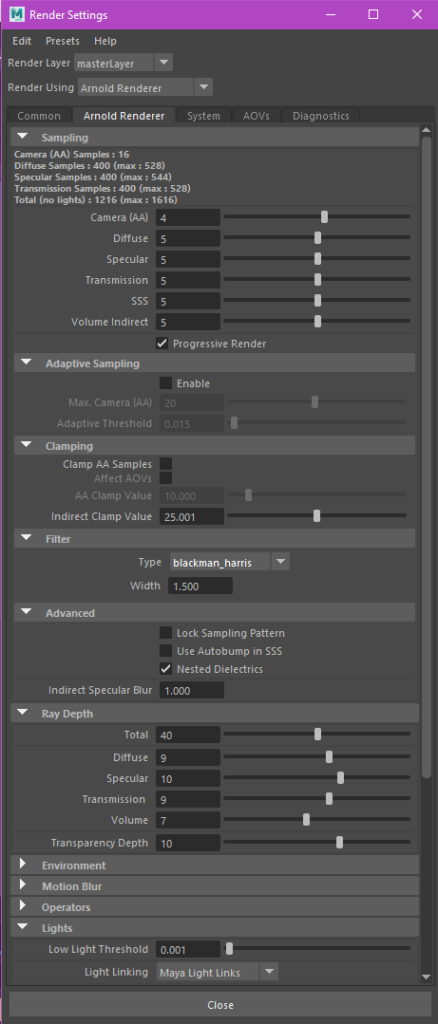
Maya [4/5/5/5/5/5] 7:45 Aiming for 5 mins


Blender [20/5/5/5/5/5] 250 settings /w Denoise 00:02:53:80
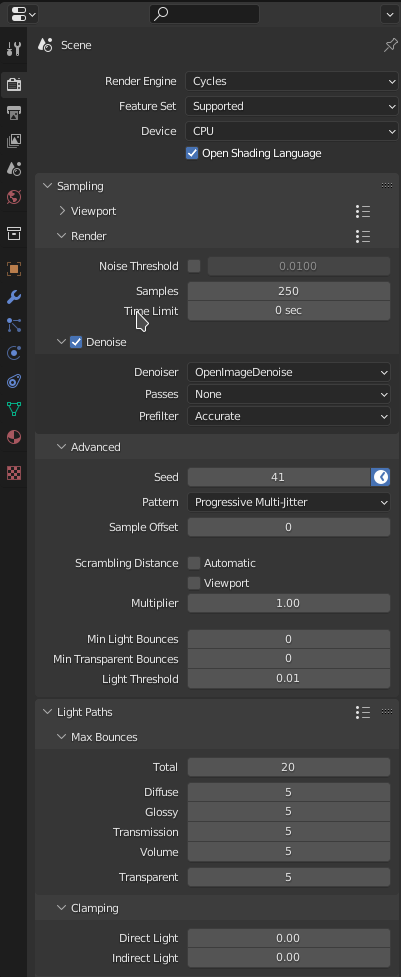

Same Thing but with Denoise off:
Blender [20/5/5/5/5/5] 10000 settings /wo Denoise 02:00:04:76
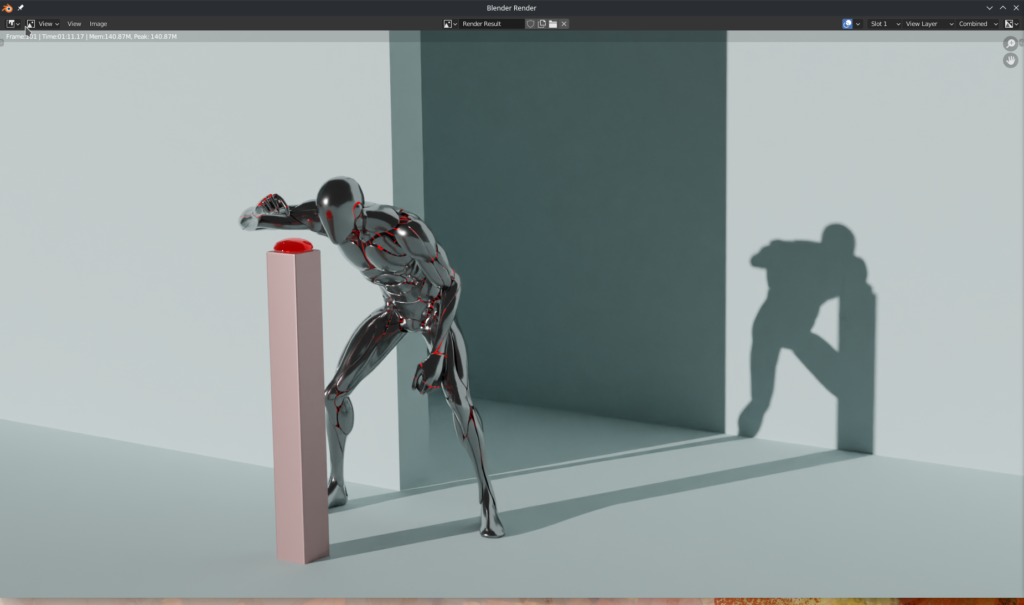
Same Thing but Captured halfway through:
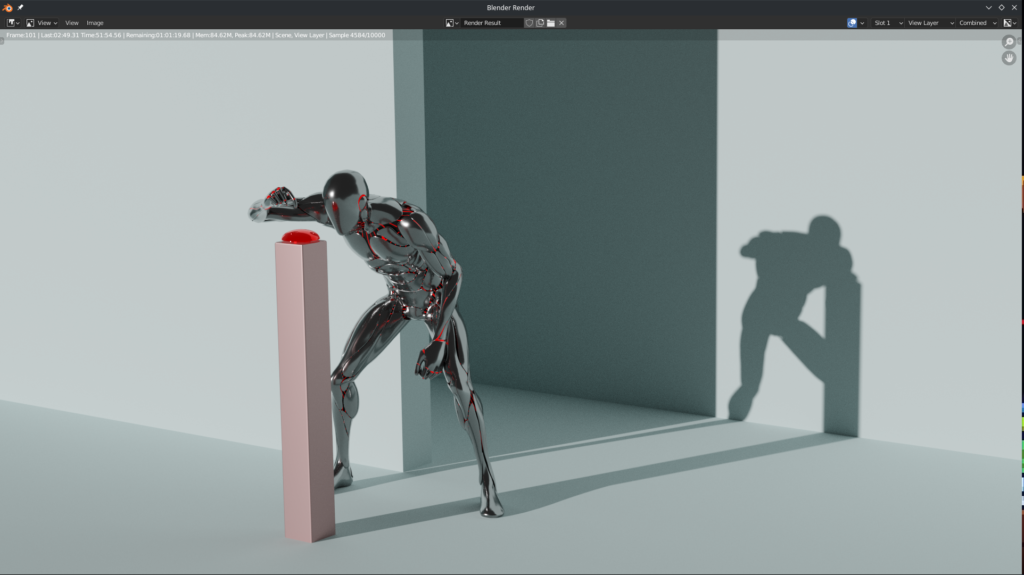
Blender [20/5/5/5/5/5] 100 settings /w Denoise 00:1:11:17

Blender [50/50/50/50/50/50] 100 settings /w Denoise 00:06:13:19


Same Thing but without Denoise:

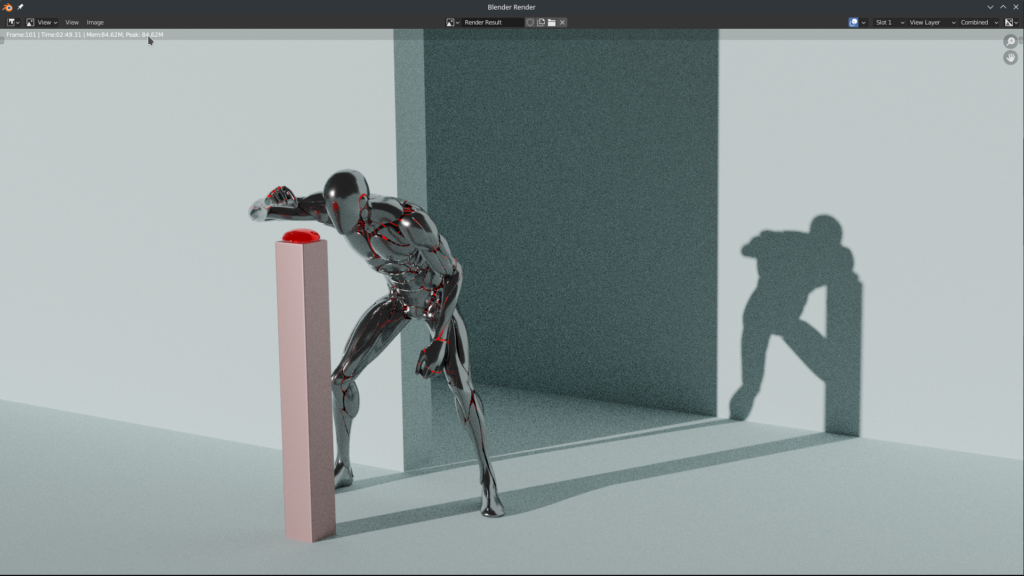
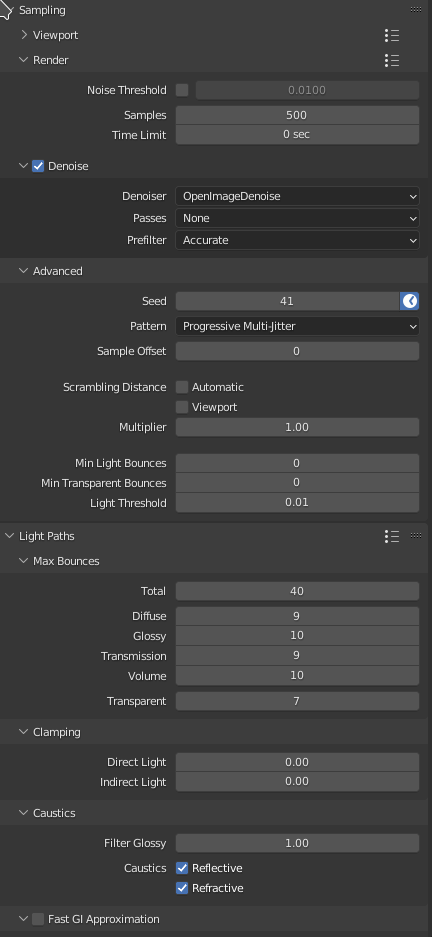
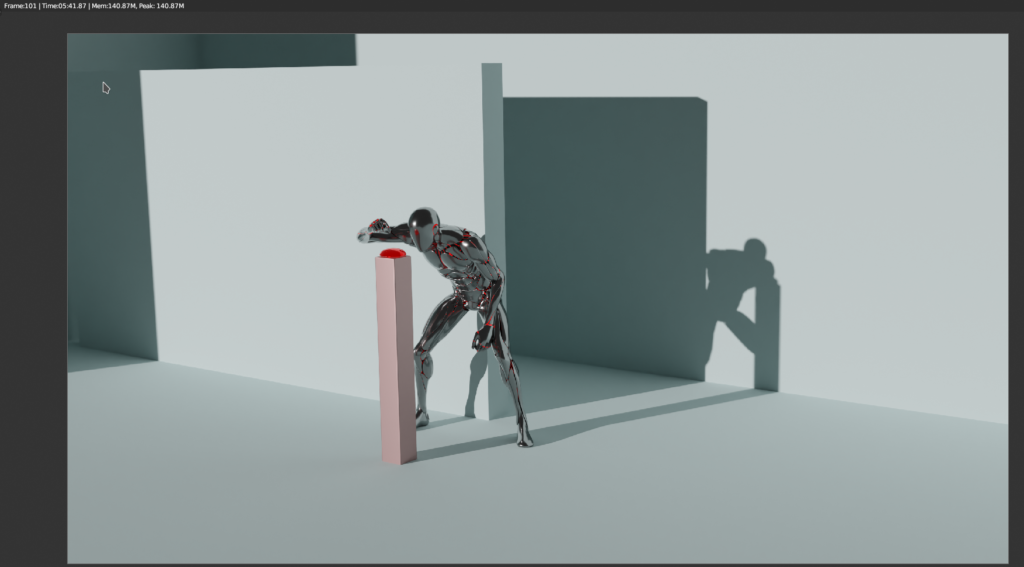
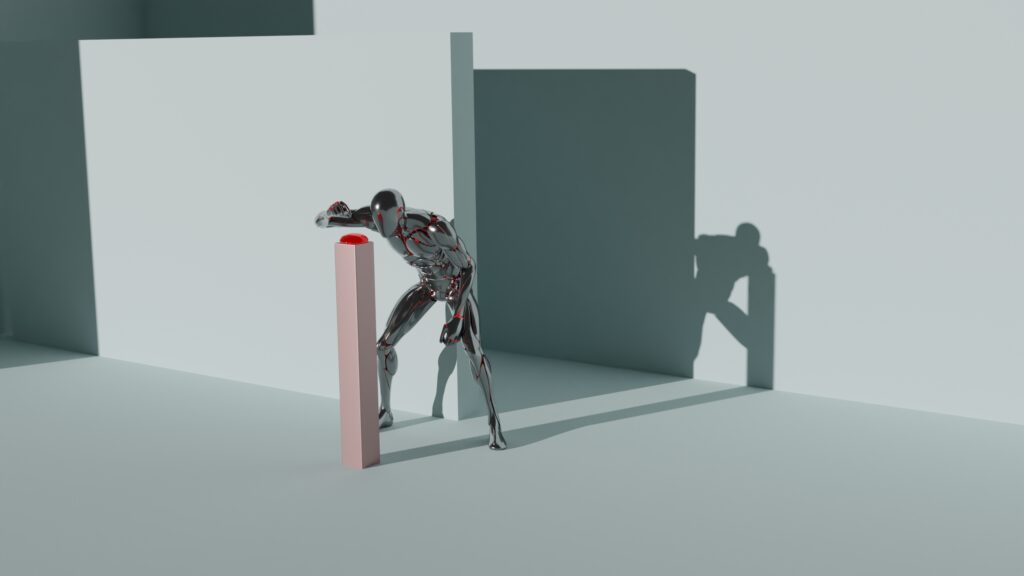
Blender FInal RENDER [40/9/10/9/10/7] 500 settings /w Denoise 00:05:41:87
Conclusions?
The first thing that hit me was Blender’s usage of OpenImageDenoise is overpowered. Maya’s Arnold renderer has a denoiser but it’s “stand-alone” and has to be run manually whereas Blender’s implementation happens immediately after the frame renders.

This allows for faster renders at lower sample rates to look good and higher quality renders to look better. That and as mentioned earlier I understand Blender’s verbose render settings and Maya’s seemed lacking. The ray depth settings did solve the shadows issue I had initially but then I couldn’t get low samples like 500ish to be lower than 7 mins, which isn’t that far off from Blender being under 6 mins. The Difference being I Know Blender was at exactly 500 samples per pixel and what exactly the ray bounces where, Maya settings say xxx(max:xxx) which I think implies a range of sample values for each ray, but I’m uncertain. Oh, and the denoise made Blender’s render look crisp while Maya’s similar render was still too noisy to be useable. I am going to render it in Blender for the foreseeable future because I understand it, It looks good when done quickly and with limited resources, and third thing.